이미 한발 늦었지만... 위기감이 느껴질 정도로 빠르게 변화하는 개발 생태계를 보며 AI를 공부하고, 잘 활용할 수 있는 방향을 찾아야겠다는 생각이 들었다.
이전 프로젝트에서 LLM 챗봇을 설계하고 구현해보긴 했지만 (물론 LLM 모델에 관여한 건 아니고, API만 잘 연동해 화면에 보여주는 정도,,) 개발하면서 PM까지 하느라 깊게 공부할 틈이 전혀 없었는데, 더 이상 미룰 수는 없다는 생각에..!
사실 너무 방대하기도 하고, 변화가 빨라서 어디서부터 공부해야 할지도 막막하지만, 우선 뭐라도 만들어봐야 할 것 같아 가이드 문서 보면서 MCP 서버를 한번 구현해보았다.
👆MCP란?
MCP란, AI 어플리이션을 외부 시스템과 연결하는 오픈 소스 기반의 표준이다.
MCP를 이용해 Claude나 ChatGPT와 같은 AI 어플리케이션들이 데이터 소스(DB, 로컬 파일 등), 툴(검색 엔진 등), 그리고 워크플로우(특정 프롬프트 등) 등 주요 정보에 대한 접근 및 과제를 수행할 수 있도록 하는 시스템들과 연동할 수 있다.
MCP는 AI 어플리케이션에 있어 USB-C포트와 같아, 외부 시스템과 AI 어플리케이션을 연결하는 표준을 제공한다.
MCP (Model Context Protocol) is an open-source standard for connecting AI applications to external systems.
Using MCP, AI applications like Claude or ChatGPT can connect to data sources (e.g. local files, databases), tools (e.g. search engines, calculators) and workflows (e.g. specialized prompts)—enabling them to access key information and perform tasks.
Think of MCP like a USB-C port for AI applications. Just as USB-C provides a standardized way to connect electronic devices, MCP provides a standardized way to connect AI applications to external systems.
출처 : https://modelcontextprotocol.io/docs/getting-started/intro
Anthropic에서 제공하는 문서를 인용하자면 위와 같고, 요약하자면 MCP는 AI 에이전트와 외부 시스템을 연동하는 표준 규약(Protocol)이라고 이해할 수 있을 것 같다.
🎢 MCP Server 구현해보기
가이드 문서가 잘 되어있어서 https://modelcontextprotocol.io/docs/develop/build-server 여기에 나와있는 대로 따라하면 된다.
나의 경우 Claude Code 대신 커서를 사용해 구현해보았다.
⚙️ 환경세팅
AI Agent(커서 or Claude), Python, uv 설치 후 프로젝트 생성 및 세팅
📝 소스코드 작성
1. MCP 서버 생성 및 초기화
2. 함수 데코레이터를 사용해 MCP tool 메소드 생성
→ 예제에서는 두 개의 tool(get_alerts, get_forecast)을 생성
3. 서버 run
요약하면 위의 순서대로 소스코드를 작성하면 된다. 소스코드 전문은 가이드 문서에서 확인 가능
from typing import Any
import httpx
from mcp.server.fastmcp import FastMCP

# 1. MCP 서버 생성 및 초기화
mcp = FastMCP("weather")

# Constants
NWS_API_BASE = "https://api.weather.gov"
USER_AGENT = "weather-app/1.0"

# 2. MCP tool 메소드
@mcp.tool()
async def get_alerts(state: str) -> str:
    """Get weather alerts for a US state.

    Args:
        state: Two-letter US state code (e.g. CA, NY)
    """

    return "\n---\n".join(alerts)

@mcp.tool()
async def get_forecast(latitude: float, longitude: float) -> str:
    """Get weather forecast for a location.

    Args:
        latitude: Latitude of the location
        longitude: Longitude of the location
    """

    return "\n---\n".join(forecasts)

# 3. run the Server
def main():
    # Initialize and run the server
    mcp.run(transport='stdio')

if __name__ == "__main__":
    main()
issue)
사실 파이썬은 익숙한 언어가 아니라 처음 서버를 run 했을 때 오류가 발생해 적잖이 당황스러웠는데,
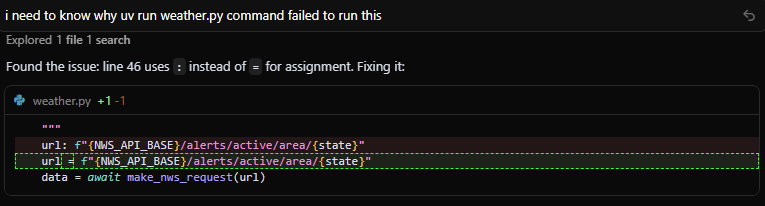
커서가 syntax error 라고 친절하게 알려주어 스무-스하게 해결할 수 있었다!
📎 AI agent 연동
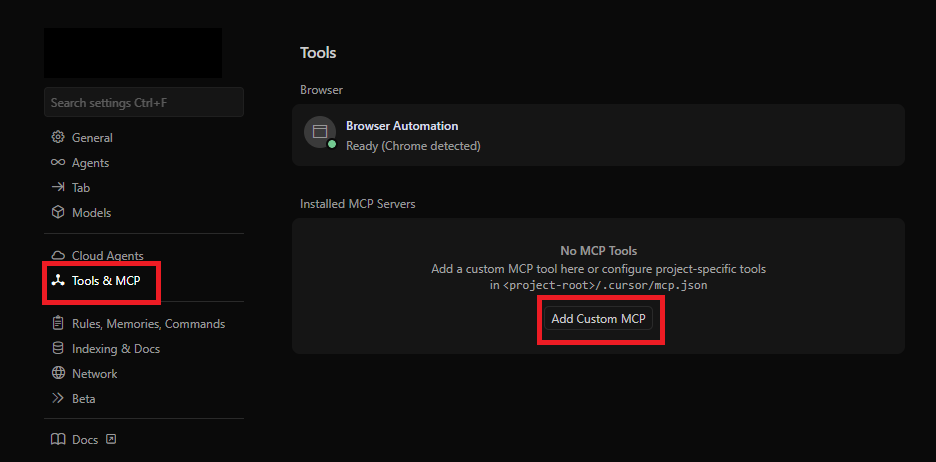
MCP 서버를 만든 후, AI agent(커서)에 내가 사용할 MCP를 등록해주어야 한다.
Cursor Settings > Tools & MCP 탭에서 Add Custom MCP 클릭
mcp.json 파일에 MCP 서버 추가
{
  "mcpServers": {
    "weather": {
      "command": "uv",
      "args": [
        "--directory",
        "C:\\Project\\mcp-tutorial",
        "run",
        "weather.py"
      ]
    }
  }
}
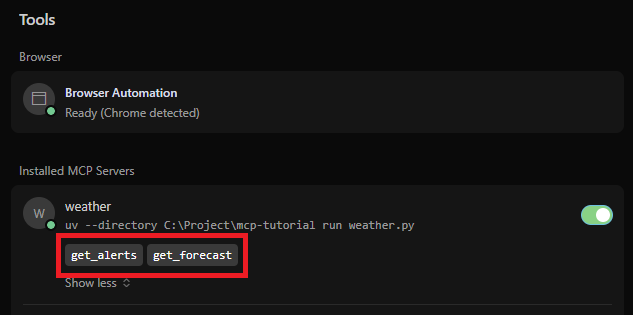
다시 Cursor Settings > Tools & MCP 탭에 들어가 보면 weather MCP와 tool로 등록한 두 개의 메소드가 보이는 것 확인
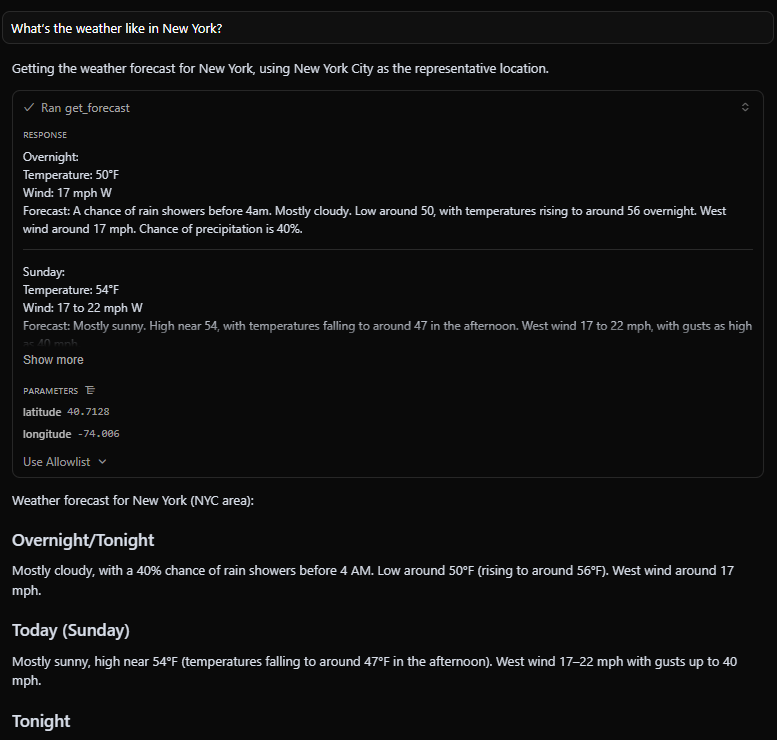
New York 주의 날씨를 질문하면 MCP tool을 선택하는 옵션이 나타나고,
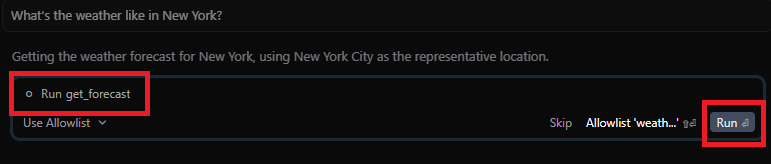
Run을 클릭하면 해당 tool 메소드 실행 결과 및 실제 응답이 채팅창에 표시된다.